Payment Methods
1.1.5. Payment Methods
Path: Organizations>Edit Organization
The back-end team handles payments by automatically charging customers' credit cards when they owe money. Customers provide their credit card information, and the developers manage the balance cap.
For example, if a club's balance reaches $55, the back-end team will charge their account to clear that balance. This cap can vary; in some cases, it might be set at $2,000, and the developers control these limits, not the customers.
-69c088888c192953fde361b1b77d0e9a.png)
Customers can add their credit card information, which will be kept on file for future payments. If they need to add another payment option, they can easily do so.
1.1.5.1. Fee Plan
Fee plans will be applied only after adding payment methods to the Organization. Fee plans allow the users to choose different plans according to their requirements. Following are the various plans from which the users can choose to go with:
- Basic
- Premium
- Enterprise
- Custom
- Free
To proceed with future payments, the user must link their payment accounts. This can be done by clicking the 'Attach Payment Method' button.

After clicking the button, the user will be redirected to a window where they can select from various payment linking methods.

By clicking on any one of the above options, the user will see another window where he will have to fill out several pieces of information regarding his payment method. Following are the payment methods that the user can choose to use:
- Add Credit Card
- Add ACH
Add Credit Card
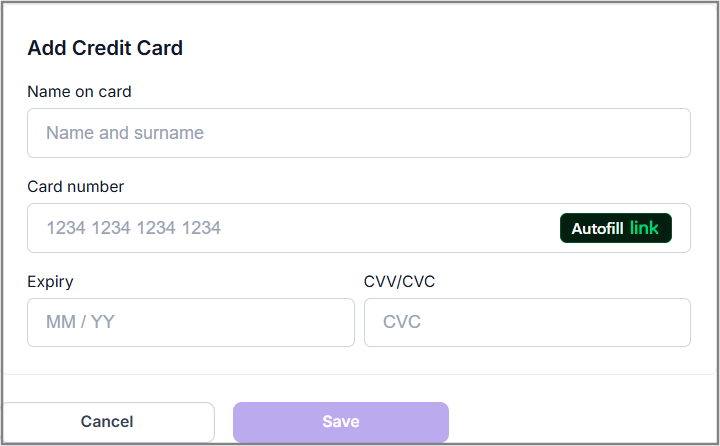
Here, the user is required to fill out credit card information, including:
- Name on the card
- Card number
- Expiry month and year
- CVV (Card Verification Value) or CVC (Card Validation Code)
The user can also autofill the card number by clicking the 'Autofill Link' option. If the user's account is linked to the 'Link' ID, the fields will automatically fill in after connecting to their account.
Add ACH
Clicking this option will take the user to a new window where they need to enter their bank details.
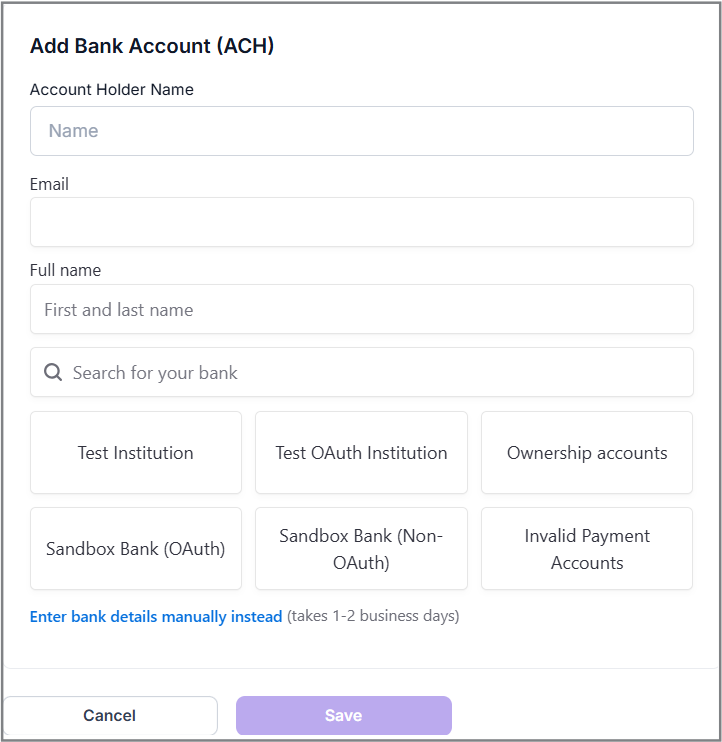
The user needs to fill out a few required fields, which include:
- Account Holder's Name
- Full Name
Additionally, the user must select the bank linked to their account. There are some suggested banks listed in the window, and the user can also search for their bank in the search panel.

If the user cannot find their bank in the provided options, they can manually enter the bank details by clicking the highlighted option in the figure above.
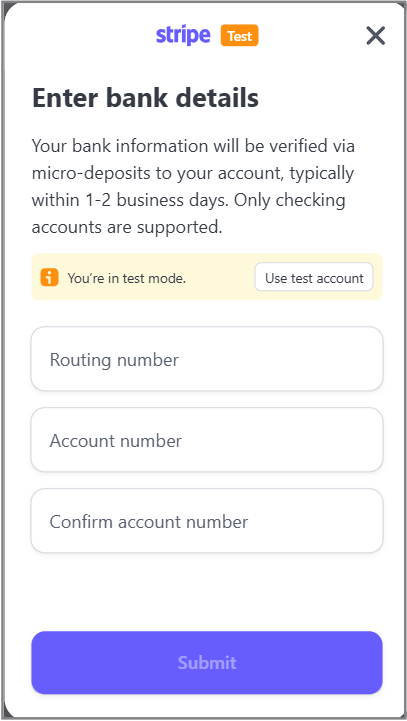
Clicking it will redirect the user to a new window where they need to fill out details related to their Stripe account, such as routing number and account number.
After clicking the "Submit" option, the user will be taken to another window similar to the previous one.

Here, the user needs to enter their email and contact number to save their account with the "Link." After providing these details, the user can select either the "Save with Link" option or the "Not Now" option to set up their contact details later.

This will guide the user to the final step of linking their account, where they will be informed that instructions will be sent via email within 1-2 business days. Once completed, the user will see that their bank account has been linked and set as the default payment method.
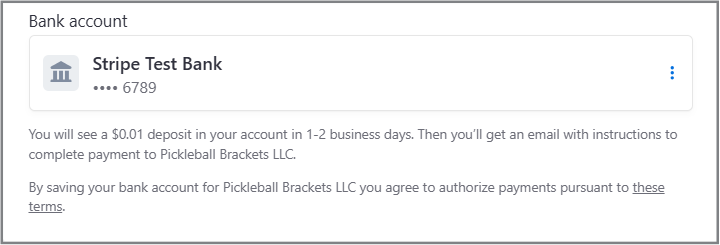
The system will notify saying ”The following payment methods are currently linked to this organization's account. These cards are securely stored and will be used for all upcoming payments”.